I've been meaning to post a complete, beginning-to-end, 'snapseeding' of a photo. Earlier today, I finally sat down in a coffee-shop, capturing step-by-step screen-shots on my iPhone: follow these shots and you'll get a step-by-step description of what you can do with snapseed.
Last summer, I spent a couple of days in Insadong (a historic neighborhood in central Seoul), and here's one of the snapshots I took with my iPhone--a 'haraboji' (respectful Korean term for 'grandfather') painting fans on the sidewalk:

(You also have the option of taking a photo directly from within the app.) One of the things that caught my eye in this scene was the expression on the young girl's face, her fascination as she watched the old artist using bamboo brushes to paint landscapes and calligraphy on the fan. In the middle of this frenetic smart-phone-crazed city, it was nice to see a parent and child enjoying traditional craftsmanship from the past...
Using the "tilt & shift" filter on the lower right, I wanted to narrow the focus so that only her face and the artist's hand would be in the same 'zone of clarity.' When you tap on the 'tilt & shift' icon, you immediately get this:

Whoa. A bit much.
So, you can 'temper it'...
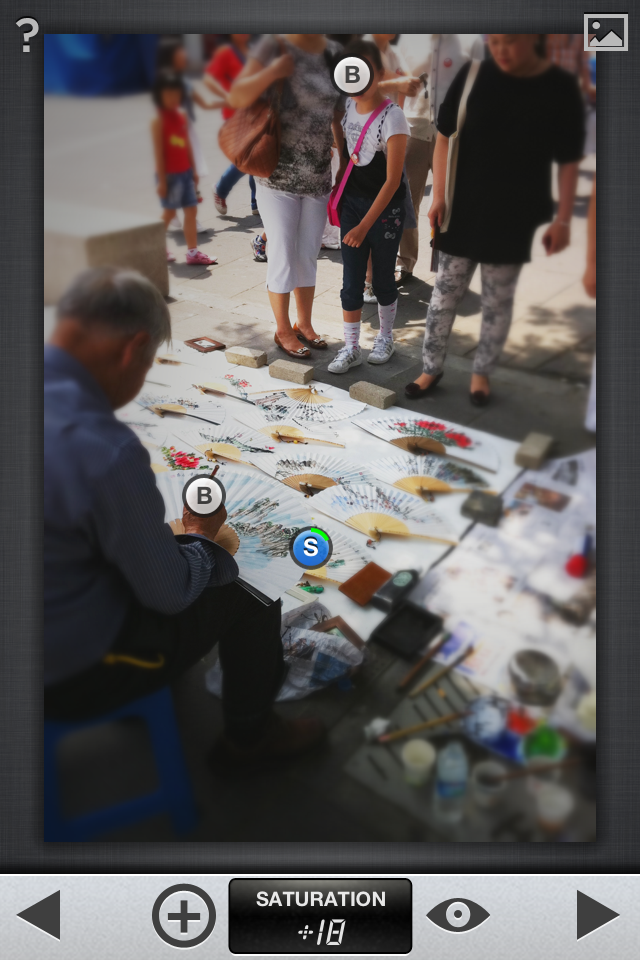
I use the elliptical option instead of the full linear option; you can use your fingers to determine exactly what you want to include in the clearly-focused area, how much blur you want, and where you want it to start--the 'transition zone:'

Including the girl's face down to the artist's hand working on the fan, I also up the saturation a bit:

And so this is the result:

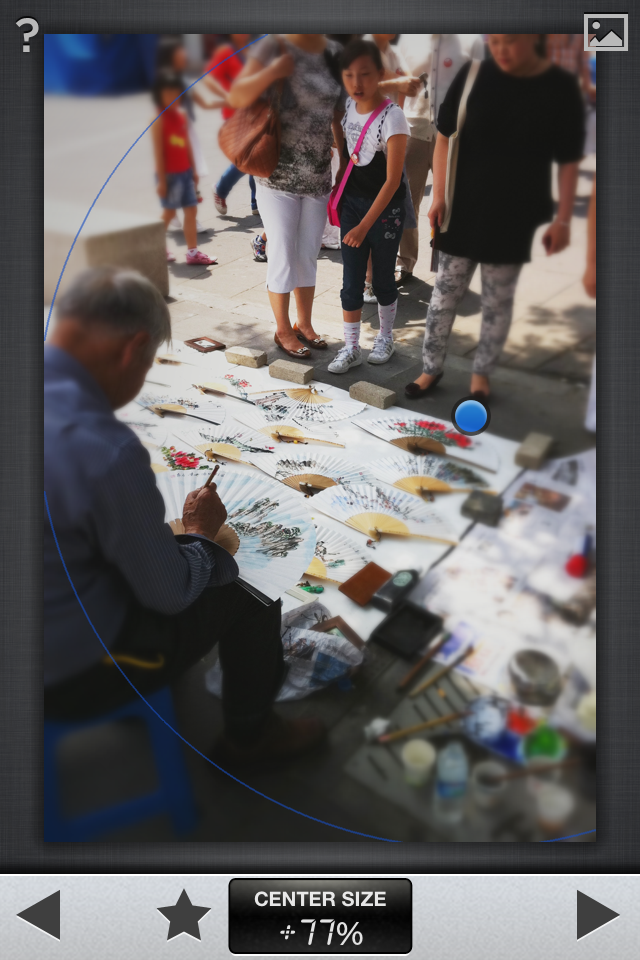
Wanting to have a bit of an old-fashioned vignette effect (darker corners), I then choose the 'center focus' filter. When that comes up, the photo seems instantly overly blurred. No worries--you can control that--note how I change the 'center size' (see the bottom of the shot) from "+20%"...

...to "77%," and also how I can shift the center (the blue dot) over:
So, now you can see the image with the corners slightly darkened:


...by brightening it a bit...

...and now the girl's face, also brightened a bit:

...and then finally, saturating the colors on the
landscape painting on the fan a bit more:
Finally, a bit of tweaking with exposure and contrast--
using the 'ambiance' feature of the "tune image" filter:

And this is the final result,
focusing on the old-young, observer-creator axis,
'in the eyes of a younger fan:'

However, knowing that photos showing the recognizable face of a minor aren't always 'publishable,' (I didn't think about asking 'formal permission' of the girl and her mother to take their photo; it was just a candid phone-shot on a busy street), I thought another possibility from this scene would be to blur the edges some more, to zero in on the artist only instead of focusing on him and his admirer.
I go back to the 'tilt & shift' filter,
this time using the elliptical selection tool to focus on the artist's hand and his fans:

But seeing all the blurred faces at the top of the scene seems
distracting to me--makes me want to rub my eyes,
put in some eye-drops, check my contacts, etc...
too much blur.

But I still want to focus only on the artist and his work. Time to crop:

...and then back to the 'ambiance' feature
in the 'tune image' filter:

...and finally,
why not?--let's frame it:

voilà, fini:

With so much manufactured now for the souvenir trade, it was
refreshing to see this 'haraboji' painting his fans, one by one, inkstone at his feet, painting slowly in the shade...
No comments:
Post a Comment